Nail extension: gel, acrylic, on forms and tips
Almost every woman dreams of beautiful and long nails. However, the lack of vitamins, washing dishes and many other factors do not allow to grow the desired length. Fortunately, there is such a procedure as nail extension, which allows every woman to become the owner of beautiful and well-groomed. What types of this procedure are and what are their differences, this article will tell.
Extension types
Currently, such a procedure as nail extension has become familiar to most women, because it allows you to forget about manicure for about 1 month. However, before going to the procedure, it is advisable to familiarize yourself with all its types in advance in order to choose the most suitable method for yourself.
There are two main extension methods:
- on tips;
- on forms.
Let's consider each in more detail.
tips
Tips are plastic plates that are attached to the nail at one end and form its free edge with the other. They are glued to about half the area of the nail plate. The length of the free edge should not exceed the area of the glued tips, otherwise the nail may break in the future.
The most durable tips are made of special ABS plastic. Such material is not afraid of high temperatures and aggressive detergents.
Plastic can be of a very different color (transparent, milky, etc.), length, bend, which allows you to choose the perfect option for a wide variety of nail plates.
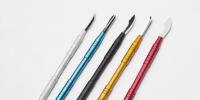
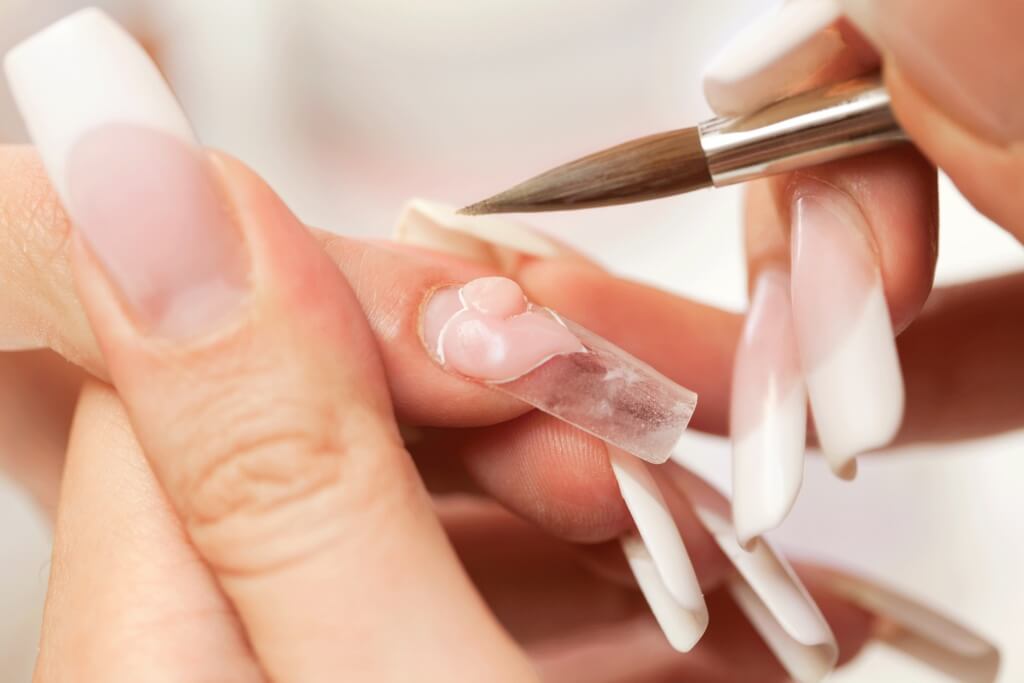
The plastic is attached to the natural nail with special glue, after which it is given the required length using a special tool - a tips cutter (boat). Next, the surface of the nail plate is leveled with a nail file (the border of contact between the nail and the tips is removed), and it is shaped. Finally, the plastic is fixed on the nail with a gel or acrylic.
It is worth remembering that the specialist removes the length of the tips with a small margin, since after laying out the gel or acrylic, additional sawing and the formation of the required shape will occur.
With high-quality extensions, such nails last from 3 to 4 weeks.
Forms
They are disposable products made of paper or foil, with which the free edge of the nail is formed. The outer side of the paper is coated with a special layer that prevents the building material from sticking to it. The other side of the product is adhesive, which allows it to be securely fixed on the finger.
In addition to disposable forms, there are also reusable options that are made of metal and fixed with special clips. Such a variety must be sterilized before each new use.
The form is fixed on the finger, substituting a special window under the free edge of the nail. After the form is fixed on the nail, its free edge is formed using gel or acrylic. There are special markings on the product that characterize the future length, you just have to choose the one you need. After choosing the length, the master lays out the material for building up on top of the form, reaching the required border. Further, after the substance has hardened and the nail plate has formed, the form is removed.
The disadvantage of this method is that the natural nail must have a small free edge, at least 1-2 mm, otherwise the shape simply will not hold. Therefore, for short-cut nails, extensions on tips are more suitable.
Forms after the formation of the free edge and the nail bed are removed and discarded. Tips, on the other hand, remain for the entire time the nails are worn until they are corrected or completely removed.
extension material
If we consider the build-up according to the material used, then it is divided into two main types: helium and acrylic.
The main differences are that acrylic dries in the open air, while the gel requires drying in a special lamp.
Let's consider each material in a little more detail.
Gel
It is a thick, jelly-like substance.
Gel comes in 2 types:
- Single phase. This type of material implies that in one jar there will be 3 types of gel at once to create different layers (base, modeling, protective). This option is ideal for beginners.
- Three-phase. This variety consists of 3 gels in different jars. Three-phase gel is more often used by professionals, as it guarantees a better and more reliable extension.
The main advantages of gel nail modeling include:
- appearance. Nails look natural, they shine and do not turn yellow;
- no unpleasant odor;
- ease of use. The material is able to spread itself over the nail plate, it does not dry out in the air, so you can work with it longer, carefully forming each nail. In addition, this material is easier to cut and give the necessary shape;
- ease of correction. During corrective actions, it is not necessary to cut off the entire surface of the gel, it is enough to file down the regrown or exfoliating parts.
However, in addition to the advantages, the gel also has disadvantages:
- firstly, for this modeling method, a special lamp is used, the ultraviolet rays of which can lead to premature aging of the skin;
- secondly, a material such as gel is less durable. For example, with a strong temperature drop, the surface of the nail may crack;
- thirdly, in order to completely remove the gel, you have to use the sawing technique, which thins the nail plate. In addition, dust generated during sawing can be harmful to health if inhaled. That is why when working, you should wear masks, gloves and use a hood.
Acrylic
Acrylic is a material for nail modeling, which consists of powder and monomer. A liquid substance is added to the powder, as a result of which it acquires the state of gruel. This mixture freezes in air. Surface hardening occurs quickly (within a few minutes), but complete polymerization is achieved after 24 or even 48 hours. That is why when building with acrylic on the first day, physical impact on the nails should be avoided.
This material also has a number of advantages and disadvantages.
The advantages of acrylic include:
- strength. This material has a higher strength;
- just shoot. To remove the material from the nail, it is not cut off like a gel, but dissolved with a special solution;
- With it, you can make beautiful decorative elements on the nail.
The disadvantages of this method include the following points:
- possible allergic reaction and unpleasant odor. Often a person is allergic to acrylic, and not everyone likes its smell;
- less natural look. When building with acrylic nails do not look so natural, their surface will be matte and may turn a little yellow over time;
- dries quickly in the air, so you need to work with it very quickly.
In addition, acrylic is considered more harmful to the body than gel. When choosing an acrylic extension, you should definitely pay attention to the composition. A substance such as methyl methacrylate is very toxic. That is why you should choose products containing ethyl methacrylate, which causes less harm.
other methods
In addition to acrylic and helium extensions, there is a combined method that combines all the best qualities of each type. This variety allows you to get strong and shiny nails.
The master can perform a combined extension in several ways:
- The base coat is done with acrylic. Next, a gel is applied over it to give the nail plate shine.
- The basis of the nail is a gel, on top of which acrylic is applied. In this case, acrylic is used to create decorative elements (flowers, etc.).
- The specialist uses the correction of acrylic nails with a gel.
- The master alternates materials.
Another type of extension is silk. With this form, a fabric is used: fiberglass, linen or silk. These materials are pre-soaked in a special solution that makes the fabric hard. Silk extension helps to preserve the health of the nail and make them more beautiful. However, this method is less popular.
There is also a biogel extension, the composition of which is more natural. Among the components of the biogel there are useful substances (proteins, vitamins, etc.). Such material allows the nail plate to breathe, it is safe and elastic. With its help, not only nail extension is carried out, but also the strengthening of the natural nail plate. The undoubted advantage of the biogel is that it is removed not by sawing, but with the help of a special liquid, thereby eliminating mechanical damage to the natural nail. The downside of this extension is its fragility.
The main stages of building
To roughly understand how the procedure goes, consider the main stages of its implementation.
gel
The main stages of building on forms:
- Disinfection, filing natural nails and pushing the cuticle (if this has not been done before) with an orange stick or a pusher. If you do not carry out such a treatment, then when the nail grows, the gel will leave precisely at the points of contact of the material with the cuticle.
- Removing shine. With the help of a coarse file (abrasive about 180 grit.), Shine should be removed from the nail plate and roughened. Most importantly, do not overdo it, otherwise you can ruin the nail plate.
- Removing dust and treating the nail with an antiseptic.
- Next, the forms are substituted under the nail, and its surface is treated with a primer (improves the adhesion of the gel to the nail plate).
- After that, a thin layer of gel is applied to the natural nail plate and dried in a lamp. The exposure time depends on the gel itself and the lamp power.
- Then, without removing the sticky layer, the free edge of the nail is formed with the help of the gel, going a little on the natural nail plate, and dried in a lamp.
- Then a third layer is applied more densely, which is also dried in a lamp. With the help of a modeling layer, a bend is formed, and the nail with a free edge is also fastened.
- Next, remove the form, remove the sticky layer and proceed to the formation of the nail. It is sawn, leveled, its surface is polished with a buff, and dust is removed with a brush.
- When the nail is fully formed, it is degreased and the design is performed.
- At the end, the finish is applied in a thin layer, the free edge is sealed, after which the nail is dried in a lamp. To soften the cuticle, it is treated with special oil.
If a three-phase gel is used, then each new layer (base, modeling, finishing) must be taken from a different jar.
During the application of the gel, it is necessary to ensure that it does not get on the skin and nail folds, otherwise the material will subsequently begin to peel off.
Acrylic
If acrylic is used, then the steps for building are as follows:
- Processing of nails before building up takes place in the same way as with the helium modeling method.
- After treating the nail with a primer, the master dilutes the acrylic powder with a monomer and picks up the acrylic ball on the brush.
- After that, he transfers the ball to the nail, evenly distributing it over the entire plate with the help of patting movements of the brush.
- If forms are used, then the specialist begins to apply acrylic from the free edge of the nail, starting to equalize the acrylic ball from the marked length down to the nail itself. After applying each ball of acrylic mixture, wipe the brush thoroughly.
- As soon as the free edge has been formed, the master proceeds to lay out the nail bed, necessarily stepping back from the nail folds and cuticles.
- Before the material hardens, it is given a bend.
- As soon as the acrylic hardens, the forms are removed and the nails are straightened, designed and glossed.
These are just the main stages of building, without mentioning most of the nuances.
In order for the nails to please their owner with beauty for as long as possible, you should remember a few simple rules:
- It is best to go for the procedure with a pre-removed cuticle. That is why you should carry out a manicure 2-3 days before building.
- On the day of the procedure, you must refuse to take a bath, as well as use for hands. Moisture and fat that remains on the nail plate is difficult to remove even with the help of special tools. If the surface is not completely degreased, then this will affect the quality of the extension.
- In order not to aggravate the condition of the nails, extensions should not be carried out on a too thin or damaged nail plate.
- Avoid the procedure for the duration of taking or antibiotics, which can affect the duration of nail wear. Chemotherapy is also a contraindication to building.
- It should be borne in mind that some diseases, as well as hormonal disruptions (during pregnancy, menopause, etc.) can affect the quality and duration of wearing artificial nails.
- When washing dishes or working with other household chemicals, be sure to use gloves.
- In the absence of building skills, you should not remove or cut your nails yourself, it is better to carry out all actions with an experienced master.
- Treat the periungual ridges and cuticles with special oil, and take care of your hands with creams containing vitamin E.
- To minimize the damage from building, it is periodically recommended to take breaks and at this time resort to restorative procedures for the nail plate.
Beautiful nails will decorate absolutely any woman and make the image truly complete. The most important thing is to choose the most suitable variant of the procedure for yourself, as well as contact only experienced craftsmen, follow all his recommendations and make corrections in a timely manner. And then the nails will always delight you with their beauty and impeccable appearance.